API Key Management
AnyAPI includes a built-in API key management system that stores your authentication credentials in one place. Instead of entering tokens or passwords every time you create an integration, you save them once and select them from a dropdown. As a result, your workflow stays organized and your credentials remain secure.
In this guide, you will learn how to add, edit, and delete API keys. Furthermore, you will learn when to choose Bearer Token versus Basic Auth for your integrations.
When Do You Need an API Key?
Most third-party APIs require some form of authentication before they accept incoming requests. In other words, the API needs to verify that your request is legitimate.
However, not every API requires credentials. For example, webhook.site accepts requests without any authentication. If you completed the Quick Start guide, you used a public endpoint that needed no API key at all.
Here is a quick reference to help you decide:
| Scenario | Auth Type | API Key Needed? |
|---|---|---|
| Webhook.site test | None | No |
| Slack Incoming Webhook | URL contains token | No |
| WhatsApp Business API | Bearer Token | Yes |
| Custom REST API with username/password | Basic Auth | Yes |
| Google Apps Script Web App | None (public deploy) | No |
If your target API requires a token or credentials, you need to create an API key in AnyAPI first. Then, you select that key when setting up your Order API Integration.
Understanding Authentication Types
AnyAPI supports two standard authentication methods. In particular, choosing the right one depends on what your target API expects.
Bearer Token
Bearer Token is the most common authentication method for modern APIs. Essentially, the API provider gives you a single token string, and AnyAPI sends it in the request header as:
Authorization: Bearer <your-token>Use Bearer Token when your API provider gives you an access token, API token, or channel access token. For instance, the WhatsApp Business API and LINE Messaging API both use Bearer Tokens.
Basic Auth
Basic Auth uses a username and password pair. In this case, AnyAPI automatically encodes them into Base64 format and sends them as:
Authorization: Basic <base64-encoded credentials>Use Basic Auth when your API provider gives you a username (or app ID) and a password (or secret key). Specifically, many ERP systems and legacy APIs use this method.
Tip: If you are unsure which type to choose, check your API provider’s documentation. Furthermore, look for keywords like “Bearer,” “access token,” or “Basic Auth” in their setup instructions.
API Key Limits by Plan
The number of API keys you can store depends on your AnyAPI plan. Specifically, the following table shows the API key management limits for each tier:
| Plan | API Key Limit | Price |
|---|---|---|
| Starter (Free) | 1 key | Free |
| Lite | 5 keys | $79/year |
| Plus | 20 keys | $149/year |
| Agency | Unlimited | $299/year |
For most store owners, 1 key is enough to get started with a single integration. Once you need to connect multiple APIs, you can upgrade to Lite or above for additional key slots.
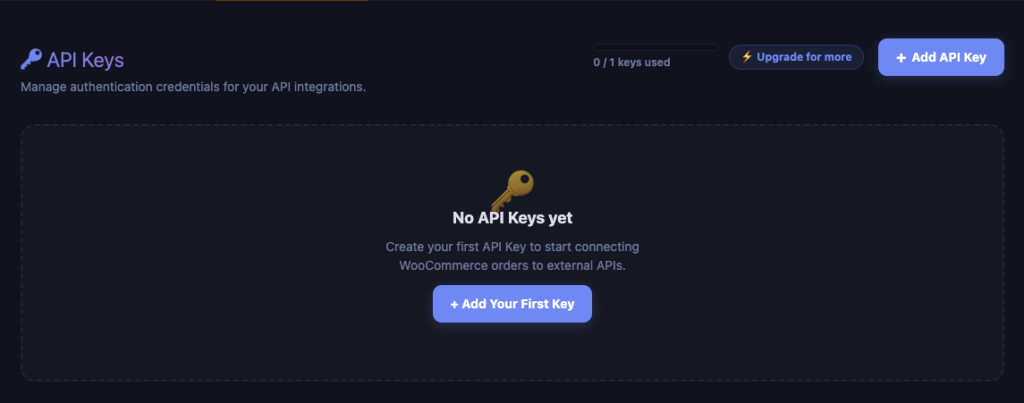
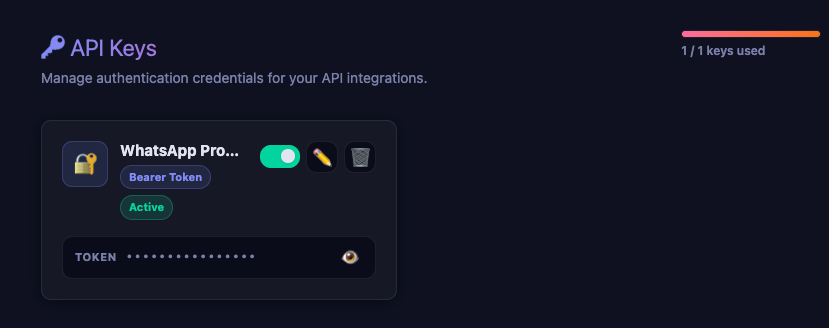
The API Keys page shows your current usage in a quota bar at the top right corner. As a result, you can always see how many keys you have used out of your plan limit.
How to Add a New API Key
Follow these steps to store a new credential in your API key management dashboard.
Step 1: Open the API Keys Page
First, go to your WordPress admin panel. Then, navigate to AnyAPI → API Keys. You will see the API Keys page with an + Add API Key button in the top right corner.
Step 2: Click Add API Key
Next, click the + Add API Key button. A form panel will slide open below the header.
Note: If the button is greyed out, you have reached your plan’s key limit. In that case, you need to delete an unused key or upgrade your plan.
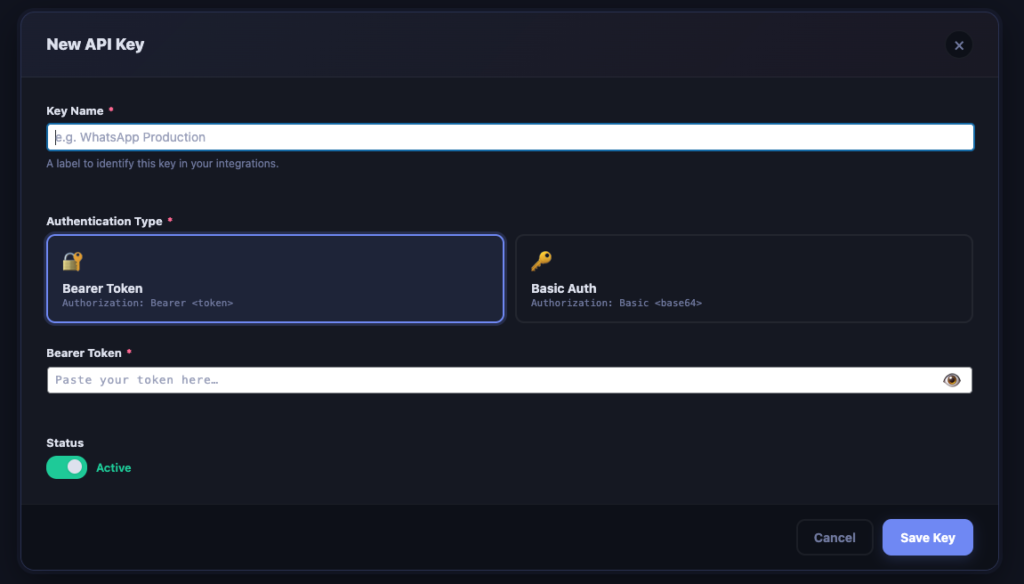
Step 3: Enter a Key Name
Give your key a descriptive name so you can identify it later. For example, use names like “WhatsApp Production” or “Staging ERP Token.”

Step 4: Choose the Authentication Type
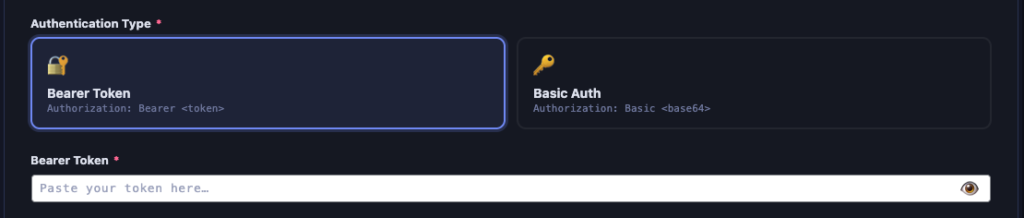
Then, select either Bearer Token or Basic Auth by clicking the corresponding button. The form fields will update accordingly.
If you chose Bearer Token:
Then, paste your token into the Bearer Token field. AnyAPI stores it securely and masks it on screen. Additionally, you can click the eye icon (👁) to temporarily reveal the token.
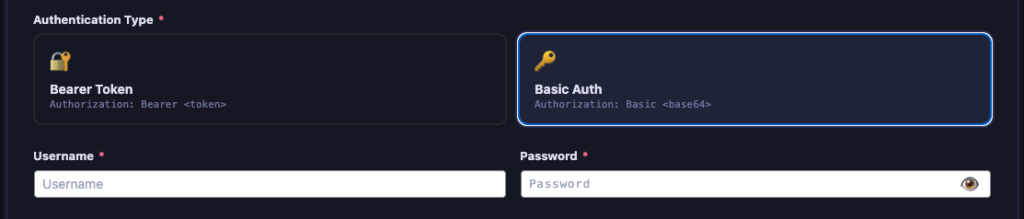
If you chose Basic Auth:
Alternatively, enter your Username and Password in the two fields that appear. Similarly, both fields are masked by default. Also, you can click the eye icon to verify your input.
Step 5: Save the Key
Finally, click Save to store your API key. After that, the form will close, and your new key will appear as a card in the key grid below. Each card shows the key name, authentication type, status badge, and a masked preview of your credentials.
How to Edit or Delete an API Key
Editing a Key
To update an existing key, click the Edit button on its card. Next, the form panel will reopen with the current values pre-filled. After making your changes, click Save to update.
Important: If you change the credentials of a key that is already used by an Order API Integration, the integration will automatically use the new credentials on the next API call. You do not need to update the integration separately.
Deleting a Key
To remove a key, click the Delete button on its card. Then, AnyAPI will show an inline confirmation message:
⚠️ Delete this key? Integrations using it will stop working.
Click Yes, Delete to confirm, or Cancel to keep the key. Note that this action cannot be undone.
Tip: Before deleting a key, check whether any active integrations reference it. Specifically, go to AnyAPI → Order API and look for integrations that use this key in their authentication dropdown.
Using Your API Key in an Integration
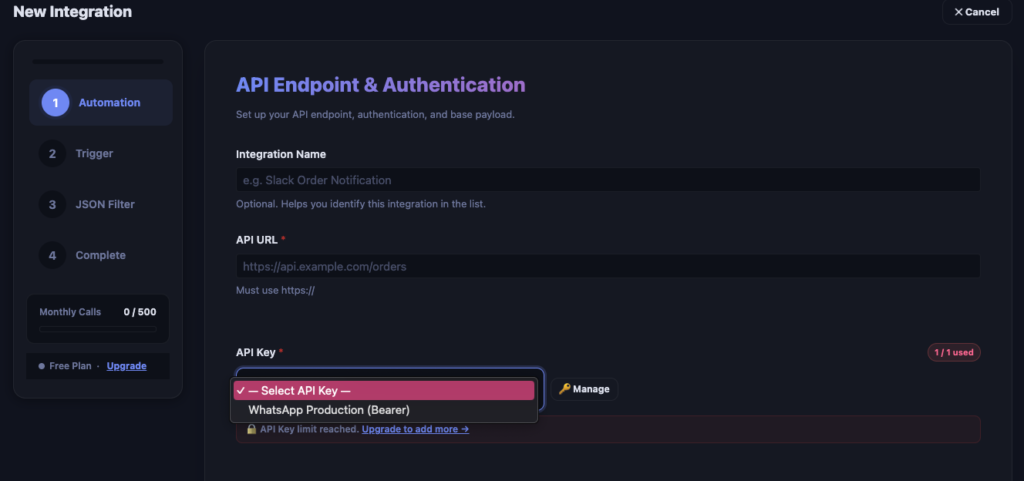
After you save an API key, it becomes available in the Order API Integration form. From here, when you create or edit an integration, you will see an Authentication dropdown that lists all your stored keys.
To connect your key to an integration, select it from the dropdown. At this point, AnyAPI will display the key name and type so you can confirm your choice. If your target API does not require authentication, select No authentication (public API) instead.
For a complete walkthrough on setting up an integration, see the Order API Integration guide.
Security and Best Practices
AnyAPI is designed with credential security in mind. Below are the key security features and best practices for API key management:
How AnyAPI Protects Your Credentials
AnyAPI follows WordPress security conventions to keep your credentials safe:
- Credentials are stored in your WordPress database — they never leave your server. AnyAPI does not transmit keys to any external service other than the API endpoint you configure.
- Credentials are never exposed to JavaScript — the browser only receives a
has_credentials: true/falseflag. The actual token or password stays server-side. - All credential fields use password-type inputs — they are masked by default and only visible when you click the reveal toggle.
Best Practices
To keep your integrations secure and well-organized, follow these recommendations:
- Use descriptive names — for instance, “WhatsApp Production” is better than “Key 1.” Consequently, you can quickly identify each key’s purpose.
- Create separate keys for each API — avoid reusing one key for multiple services. As a result, if one API’s credentials change, you only update one key.
- Delete unused keys — if you deactivate an integration permanently, also remove its API key. This reduces your credential footprint.
- Rotate credentials regularly — when your API provider issues new tokens, update the key in AnyAPI immediately. In particular, check for expiration dates on Bearer Tokens.
Troubleshooting
If you encounter issues with your API keys, first check the following common scenarios:
| Problem | Cause | Solution |
|---|---|---|
| “Add API Key” button is greyed out | Plan key limit reached | Delete an unused key or upgrade your plan |
| Integration returns 401 Unauthorized | Token expired or incorrect | Edit the key and paste a fresh token |
| Integration returns 403 Forbidden | Token is valid but lacks permissions | Check your API provider’s permission settings |
| Wrong auth type selected | Bearer Token used where Basic Auth is required (or vice versa) | Delete and recreate the key with the correct type |
For more detailed error diagnosis, see the API Logs & Troubleshooting guide. In addition, if your plan includes real-time API logs, you can inspect the exact request headers that AnyAPI sends.
Next Steps
Now that you understand API key management in AnyAPI, here is what to do next:
- Set up your first integration — follow the Order API Integration guide to connect your WooCommerce store to an external API.
- Compare plan features — if you need more key slots or advanced features, check the Feature Comparison page.
- Test without credentials first — if you are new to AnyAPI, try the Quick Start guide using webhook.site. No API key is required.