In this guide, you’ll walk through a complete WooCommerce API integration setup using AnyAPI. By the end, you’ll see live order data arriving at a test endpoint — confirming that your store is connected and firing API calls correctly.
Best of all, no coding is required. The entire setup takes about 5 minutes.
Time required: ~5 minutes
Plan required: Starter (Free) or above
What you’ll need: A WordPress site with WooCommerce installed
What This WooCommerce API Integration Does
In this quick start, you’ll set up a test integration that sends WooCommerce order data to webhook.site — a free service that lets you inspect incoming HTTP requests in real time. In fact, this is the fastest way to verify your WooCommerce API integration setup is working.
After that, you can swap the test URL for any real API endpoint — Slack, Google Sheets, a CRM, your ERP, or any service that accepts REST API calls.
Step 1: Get a Test API Endpoint
First, go to webhook.site. The page automatically generates a unique URL for you.
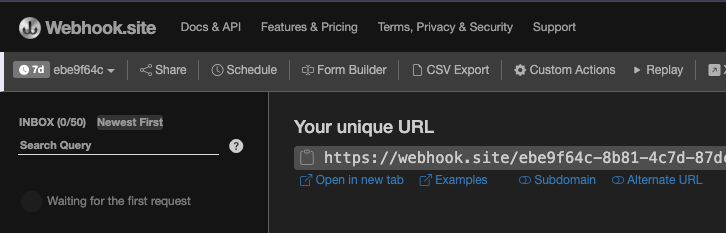
Next, copy this URL — you’ll paste it into AnyAPI in the following step. Therefore, keep this browser tab open so you can see incoming requests arrive in real time.
Tip: Your webhook.site URL looks like
https://webhook.site/xxxxxxxx-xxxx-xxxx-xxxx-xxxxxxxxxxxx. Note that, each URL is unique to your session.
Step 2: Create an API Key
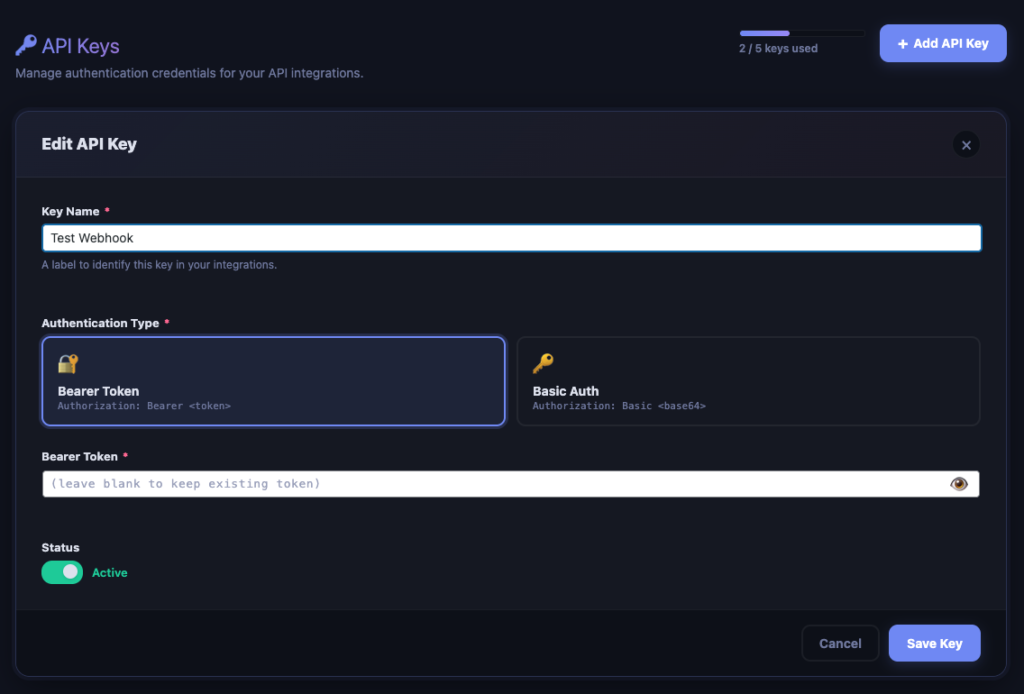
Before creating an integration, you need at least one API key stored in AnyAPI. Because webhook.site doesn’t require authentication, we’ll create a Bearer Token key with a placeholder value.
- To start, go to AnyAPI → API Keys in your WordPress admin.
- Then, click + New API Key.
- Next, Fill in the fields:
- Name:
Test Key - Type: Bearer Token
- Token:
test-token(any value — webhook.site ignores authentication)
- Name:
- Finally, click Save.
Why create a key for a public endpoint? Essentially, AnyAPI requires an API key for every integration. As a result, you’ll always have credentials ready when you move to real APIs later. For services like webhook.site that don’t need auth, any placeholder value works. Learn more about key types in the API Key Management guide.
Step 3: Set Up Your WooCommerce API Integration
Now let’s wire up the WooCommerce API integration. In other words, this is where you tell AnyAPI what order event to listen for, where to send the data, and what payload format to use.
- To begin, go to AnyAPI → Order API.
- Then, click + New Integration to open the setup wizard.

Configure Your API Integration
Next, set up the destination and payload for your WooCommerce API integration:
- Integration Name:
Webhook Test - API Endpoint URL: Paste your webhook.site URL from Step 1.
- API Key: Select
Test Keyfrom the dropdown. - HTTP Method: POST (default)
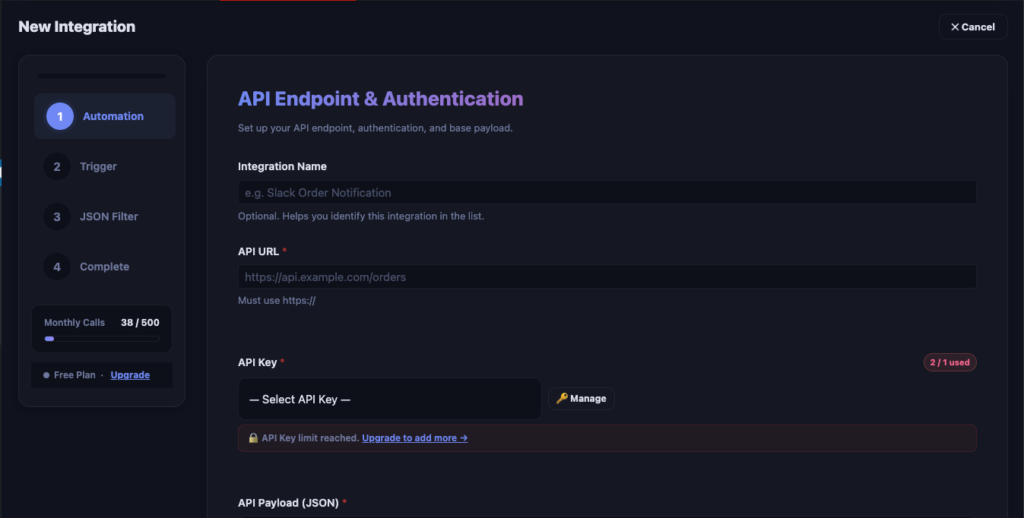
Afterwards, click Next to proceed.
Choose a Trigger
First, the wizard asks when AnyAPI should fire. Then, select New Order — specifically, this triggers whenever a customer places a new order (order status changes to “pending”).
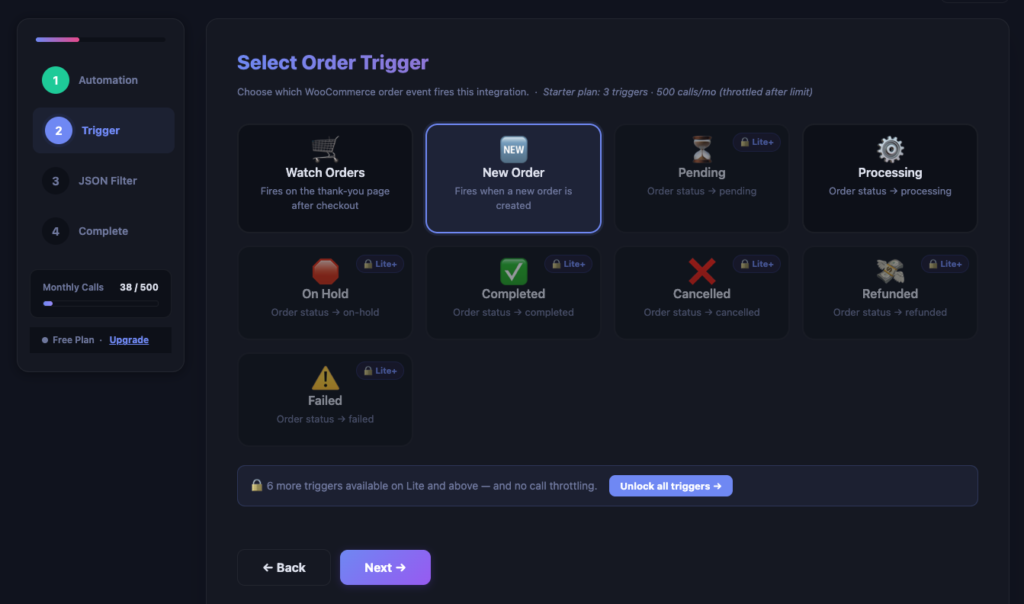
Once selected, click Next to proceed.
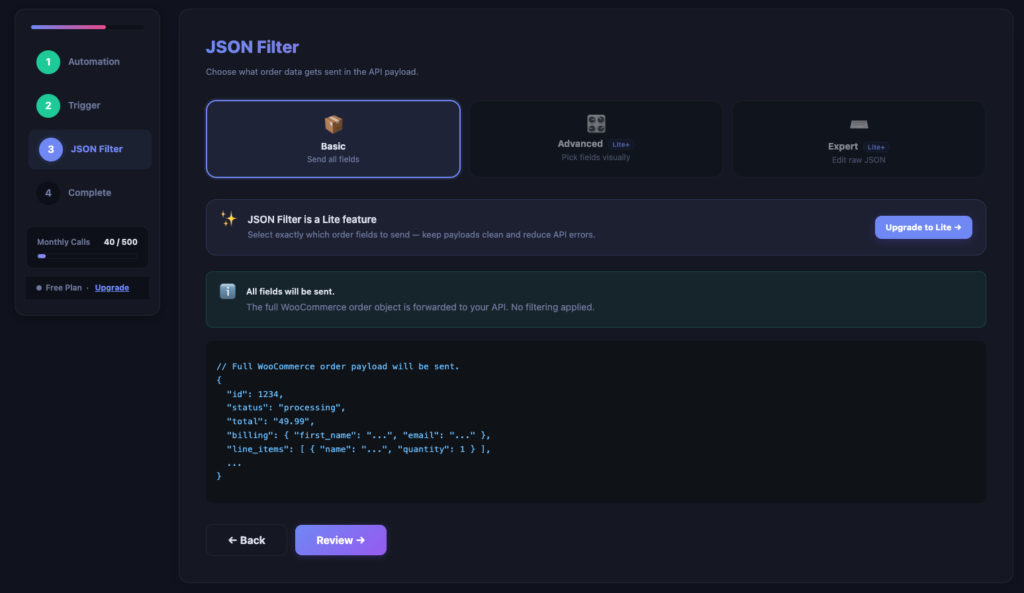
Select JSON Filter
AnyAPI builds the JSON payload automatically based on your selection — you can preview it in the panel on the right.
Review and Save
At this point, the wizard shows a summary of your integration. Review the details, then click Save Integration.
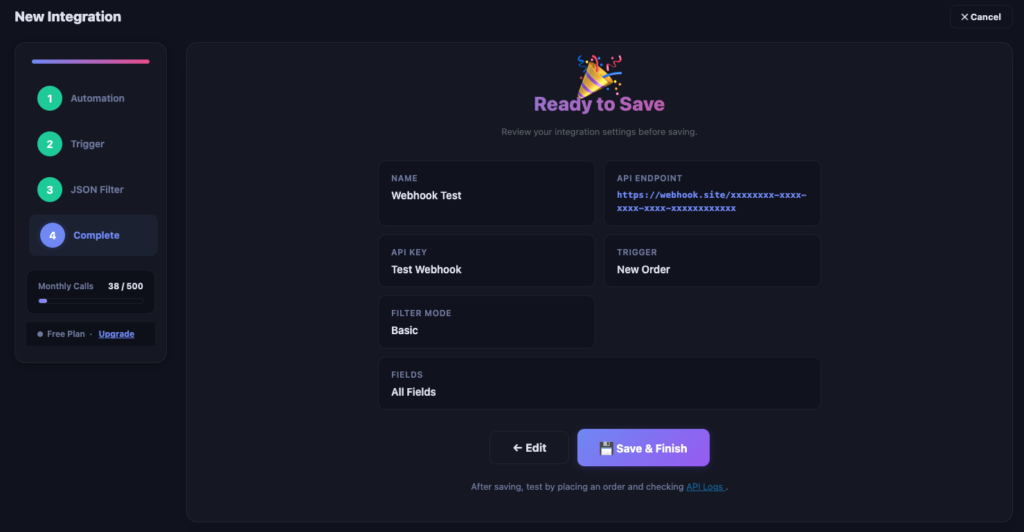
Your WooCommerce API integration is now active and waiting for orders.
Step 4: Test Your API Integration
To verify, place a test order on your WooCommerce store to trigger the integration. The quickest way:
- First, go to WooCommerce → Orders → Add Order in your WordPress admin.
- Then, set the order status to Pending Payment.
- Also, add any product and fill in a test billing name and email.
- Finally, click Create.
After that, switch to your webhook.site tab. You should see the incoming POST request with your order data:
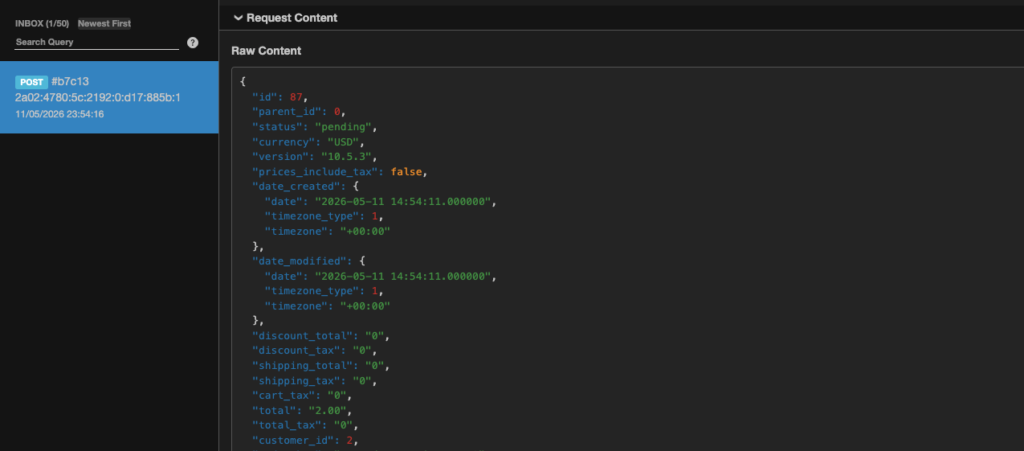
That’s it — your first WooCommerce API integration setup is complete and verified.
Step 5: Verify Your Integration in the API Log
Furthermore, AnyAPI logs every outgoing API call so you can monitor your integrations and troubleshoot issues.
Next, go to AnyAPI → API Logs to see your test call:
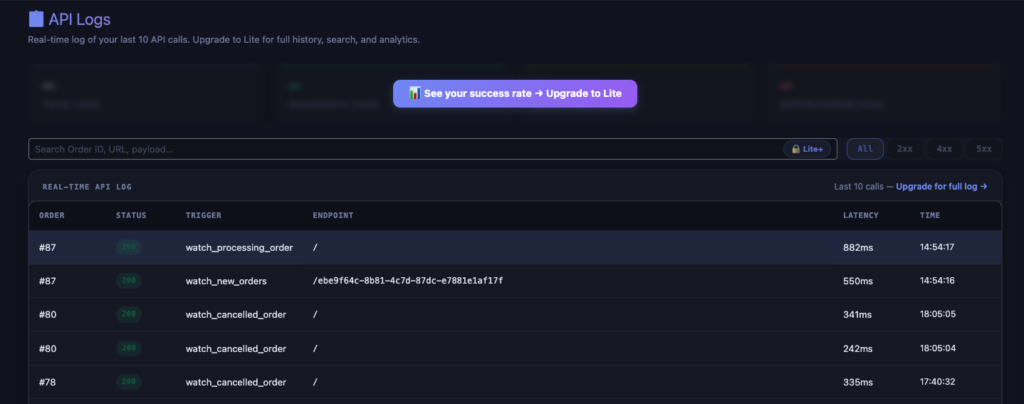
Specifically, each log entry shows:
- Order ID — which WooCommerce order triggered the call
- Status — the HTTP response code (200 = success)
- Trigger — new order, processing etc.
- Endpoint — the URL path that received the call
- Latency — how long the API took to respond
- Time — in particular, when the call was made
On the Starter (Free) plan, you can see your last 10 API calls in a read-only log. Upgrade to Lite for full search, filtering, and analytics. Compare plans →
Next Steps for Your WooCommerce API Integration Setup
Your WooCommerce API integration setup is verified and working. From here, you can replace the webhook.site URL with a real API endpoint to start automating your store operations.
Here are some common next steps:
- Send order notifications to Slack → — Get notified in a Slack channel every time a new order comes in.
- Test with the built-in REST API Tester → — For instance, use AnyAPI’s built-in tool to test your WooCommerce REST API endpoints before building integrations.
- Learn about API Key management → — Set up Bearer Token or Basic Auth credentials for APIs that require authentication.
- Explore JSON Filter Mode → — Transform and customize your payload with advanced field mapping (Lite plan and above).
Troubleshooting Your WooCommerce API Integration
I don’t see any request on webhook.site
- Check the order status. In particular, the “New Order” trigger fires when an order enters “pending” status. Make sure your test order has the correct status.
- Check the integration status. Go to AnyAPI → Order API and confirm your integration shows as Active (toggle is on).
- Check the API Log. Go to AnyAPI → API Logs. However, if you see a log entry with a 4xx or 5xx status, the call was attempted but failed — consequently, check the endpoint URL for typos.
- Check for caching. In addition, if your host uses object caching (e.g., Redis), settings changes may not take effect immediately. Try clearing the cache from your hosting panel.
I see a 4xx or 5xx error in the API Log
- 400 Bad Request — In this case, your JSON payload likely has a syntax error. Validate it at jsonlint.com.
- 404 Not Found — Similarly, the endpoint URL is likely incorrect.
- 405 Method Not Allowed — In this case, the API endpoint doesn’t accept POST requests. Confirm the correct HTTP method in the API’s documentation.
- 500 Internal Server Error — In this case, the receiving server had an error. This is on the API side, not AnyAPI.
Need more help? Visit the AnyAPI support forum or contact us.