AnyAPI includes a built-in REST API tester that lets you send requests to your WooCommerce store and inspect responses — all from your WordPress dashboard. As a result, you can verify that your WooCommerce REST API works correctly before setting up any integrations.
In this guide, you will learn how to use the REST API tester to fetch your store’s order list. Specifically, you will send a GET request, authenticate with WooCommerce Consumer Keys, and read the JSON response. The entire process takes about 5 minutes.
Before You Start
Before using the REST API tester, make sure you have the following:
- First, a WordPress site with WooCommerce installed and activated
- Second, the AnyAPI plugin installed (any plan, including the free Starter)
- Third, at least one WooCommerce order in your store (for testing purposes)
- Finally, WooCommerce REST API Consumer Keys (you will generate these in Step 1)
Note: The REST API tester works on all AnyAPI plans. In other words, you do not need a paid license to follow this guide.
Step 1: Generate WooCommerce Consumer Keys
First, you need to create API credentials so the REST API tester can authenticate with your WooCommerce REST API.
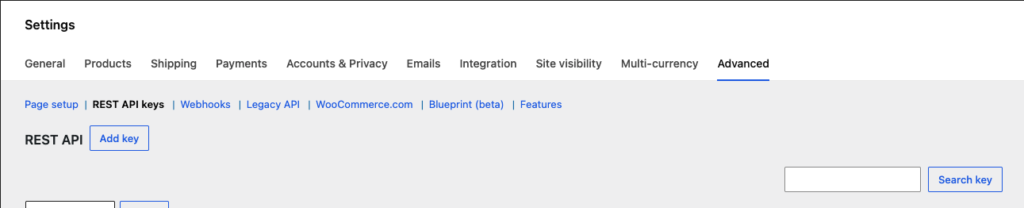
To begin, go to your WordPress admin panel. Then, navigate to WooCommerce → Settings → Advanced → REST API. Next, click Add key.
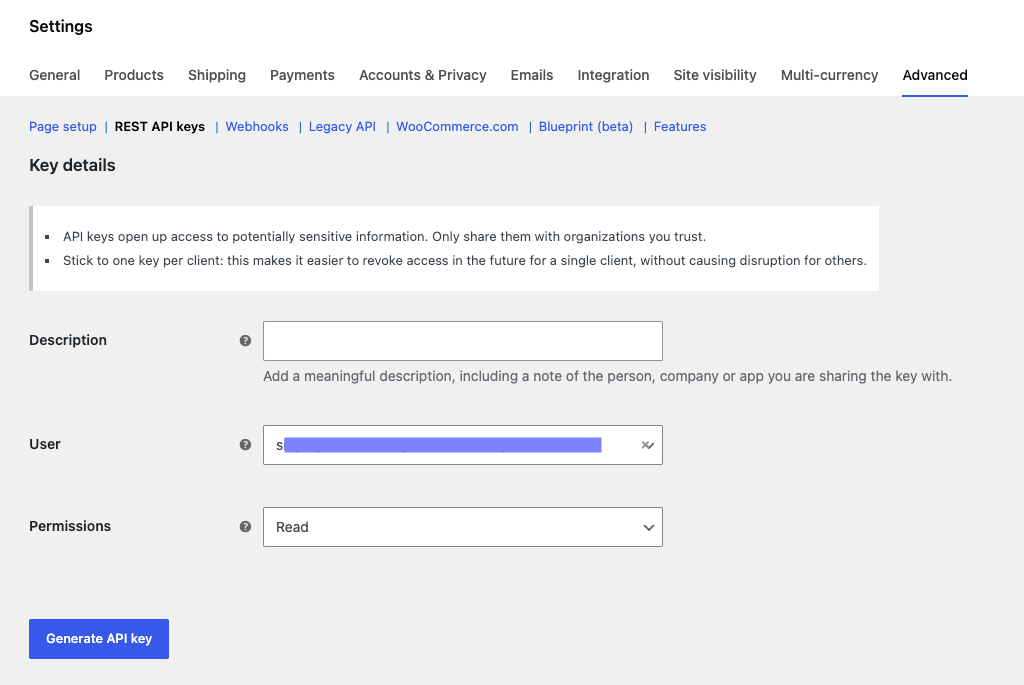
After that, fill in the following fields:
- Description — enter a name like “AnyAPI Tester”
- User — select your admin user
- Permissions — choose Read (sufficient for this guide)
Finally, click Generate API key. WooCommerce will display your Consumer Key and Consumer Secret. Copy both values immediately, because the Consumer Secret will not appear again after you leave this page.
Tip: Store your Consumer Key and Secret in a safe place. If you lose the Secret, you will need to generate a new key pair.
Step 2: Open the REST API Tester
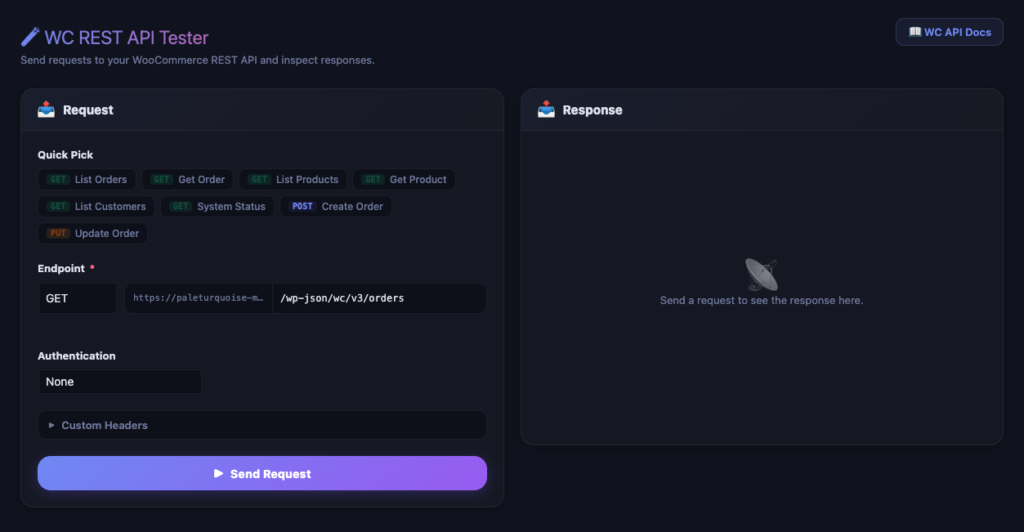
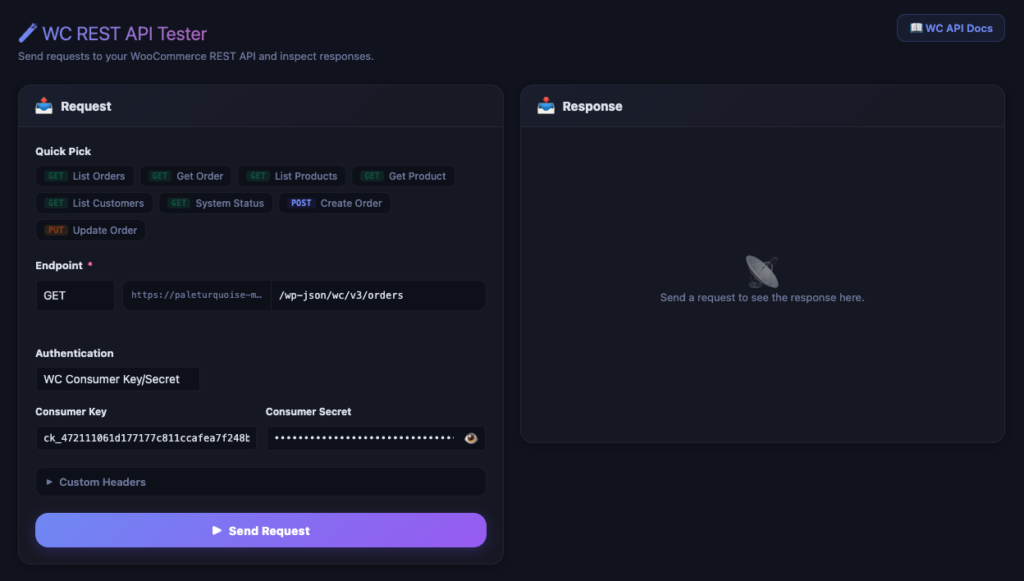
Now, navigate to AnyAPI → WC REST API in your WordPress admin sidebar. As a result, you will see the REST API tester interface with three main sections:
- First, the request panel at the top (method selector, URL input, and authentication)
- Second, the request body editor in the middle (for POST/PUT requests)
- Third, the response panel at the bottom (status, body, and headers)
Step 3: Select an Endpoint in the REST API Tester
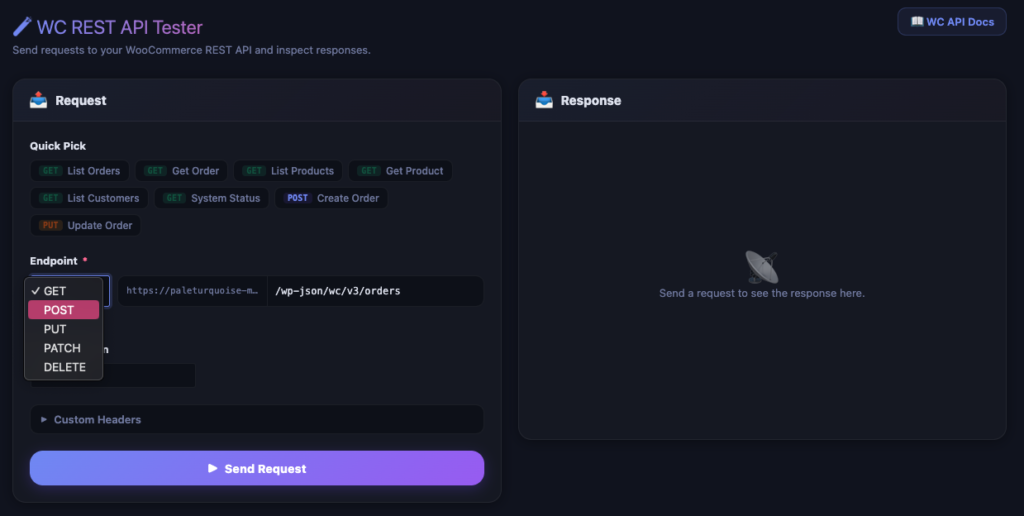
Instead of typing the full endpoint URL manually, you can use the quick-pick dropdown. Specifically, click the Quick-pick dropdown at the top of the request panel. AnyAPI provides several common WooCommerce endpoints:
| Endpoint | Method | Path |
|---|---|---|
| List Orders | GET | /wp-json/wc/v3/orders |
| Get Order | GET | /wp-json/wc/v3/orders/{id} |
| List Products | GET | /wp-json/wc/v3/products |
| Get Product | GET | /wp-json/wc/v3/products/{id} |
| List Customers | GET | /wp-json/wc/v3/customers |
| System Status | GET | /wp-json/wc/v3/system_status |
For this guide, select List Orders. After that, AnyAPI will automatically set the method to GET and fill in the URL field with /wp-json/wc/v3/orders.
Step 4: Configure REST API Tester Authentication
Next, you need to tell the REST API tester how to authenticate with WooCommerce. Click the Auth Type dropdown and select WC Consumer Key.
Then, two input fields will appear:
- Consumer Key — paste the key you copied in Step 1
- Consumer Secret — paste the secret you copied in Step 1
Important: The REST API tester also supports three other authentication methods: None (for public endpoints), Saved Key (for keys stored in API Key Management), and Bearer Token (for custom tokens). However, for WooCommerce endpoints, WC Consumer Key is the standard choice.
Step 5: Send the Request
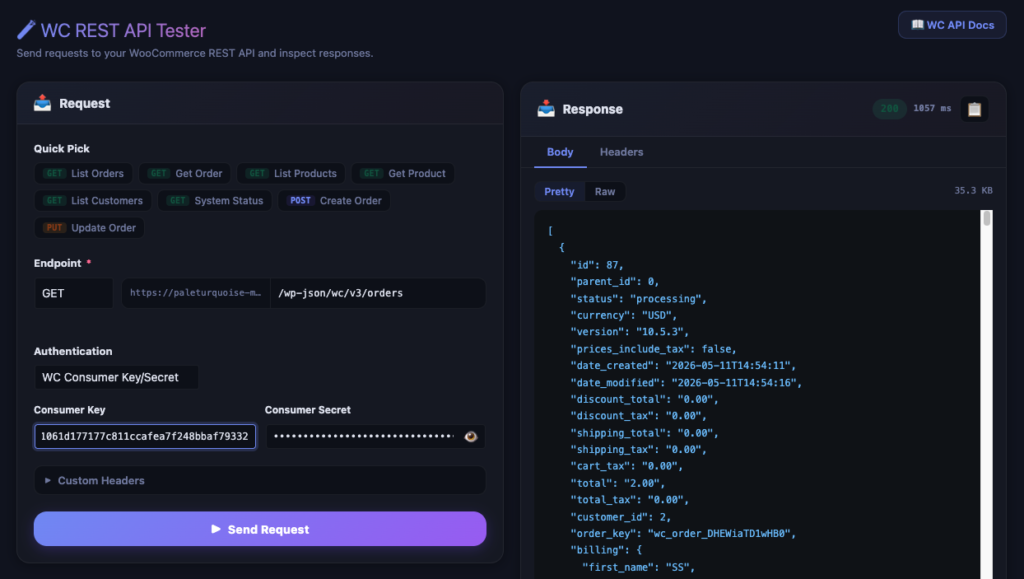
Now, click the Send button. The REST API tester will send the request to your WooCommerce store and display the response below.

After a moment, you will see three pieces of information in the response panel:
Status Badge
First, a colored badge shows the HTTP status code. A green 200 badge means the request succeeded. Conversely, a red 401 or 403 badge means authentication failed. For troubleshooting, see the Common REST API Tester Errors section below.
Response Body
Second, the response body shows your WooCommerce order data in JSON format. By default, the REST API tester displays the response in Pretty mode with syntax highlighting. Alternatively, you can click Raw to see the unformatted JSON.
Response Headers
Third, click the Headers tab to view the response headers. In particular, these headers include useful information like X-WP-Total (total number of orders) and X-WP-TotalPages (total pagination pages).
Latency
In addition, the response panel displays the request latency in milliseconds. As a result, you can quickly identify slow API endpoints.
Step 6: Copy or Inspect the Response
After receiving a successful response, you have several options:
- First, click Copy to copy the entire JSON response to your clipboard. Consequently, you can paste it into a text editor or share it with your team.
- Second, scroll through the Pretty view to inspect individual order fields like
id,status,billing, andline_items. - Third, switch to the Headers tab to check pagination and rate limit information.
Tip: If the response contains many orders, WooCommerce paginates the results. Specifically, the default limit is 10 orders per page. To fetch more, add
?per_page=25to the endpoint URL.
Why Use the REST API Tester?
The built-in REST API tester serves several purposes beyond simple testing:
- First, verify your WooCommerce REST API works — before setting up an Order API Integration, you can confirm that your store’s API responds correctly. As a result, you avoid debugging integration issues caused by API problems.
- Second, inspect order data structure — the JSON response shows you exactly which fields WooCommerce includes. Therefore, you know which fields to map when configuring your JSON Filter.
- Third, debug failed integrations — if an integration returns errors, you can replay the request manually in the tester. Consequently, you can isolate whether the issue comes from your WooCommerce store or the external API.
- Finally, test before you commit — instead of creating a full integration to test an endpoint, you can use the tester to verify the endpoint works first.
Common REST API Tester Errors
If the REST API tester returns an error, check the following table:
| Status Code | Meaning | Solution |
|---|---|---|
| 401 Unauthorized | Consumer Key or Secret is incorrect | First, verify that you copied the full key without extra spaces. Then, try generating a new key pair. |
| 403 Forbidden | The key lacks the required permissions | Go to WooCommerce → Settings → Advanced → REST API. Then, edit the key and change permissions to Read/Write. |
| 404 Not Found | The endpoint URL contains a typo | In this case, check the URL path. Also, make sure your site uses pretty permalinks (Settings → Permalinks). |
| 500 Internal Server Error | A server-side error occurred | Specifically, check your server’s PHP error log. In addition, try the System Status endpoint to verify your REST API works at all. |
For more detailed troubleshooting, see the API Logs & Troubleshooting guide.
Next Steps
Now that you know how to use the REST API tester, here is what to do next:
- First, set up your first integration — follow the Order API Integration guide to connect your WooCommerce orders to an external API.
- Second, try a real-world test — follow the Quick Start: Webhook Test to send order data to webhook.site. As a result, you can see exactly what data AnyAPI sends.
- Third, explore advanced features — if you need to customize the JSON payload, see the JSON Filter Mode guide (requires Lite plan or above).
- Finally, compare plans — check the Feature Comparison page to see which plan fits your needs.