Getting started with WooCommerce API integration takes just a few minutes. In this guide, you will learn how to install the AnyAPI plugin, activate it, and confirm everything works correctly. By the end, your store will be ready to send order data to any external REST API — no coding required.
What You Need Before You Install the AnyAPI Plugin
Before you begin, make sure your WordPress site meets these requirements:
First, you need WordPress 5.6 or higher. Second, your store must run WooCommerce 6.0 or higher. Third, your hosting environment must support PHP 7.4 or above. Finally, you need administrator access to your WordPress dashboard.
Most modern WordPress hosts already meet these requirements. If you are unsure about your PHP version, go to Tools → Site Health → Info → Server in your WordPress dashboard to check.
Install AnyAPI Plugin from WordPress.org
The easiest way to install the AnyAPI plugin is directly from the WordPress plugin directory. Follow these steps to get started.
First, log in to your WordPress admin dashboard. Then, navigate to Plugins → Add Plugins from the left sidebar. Next, type “AnyAPI” in the search box at the top right corner.
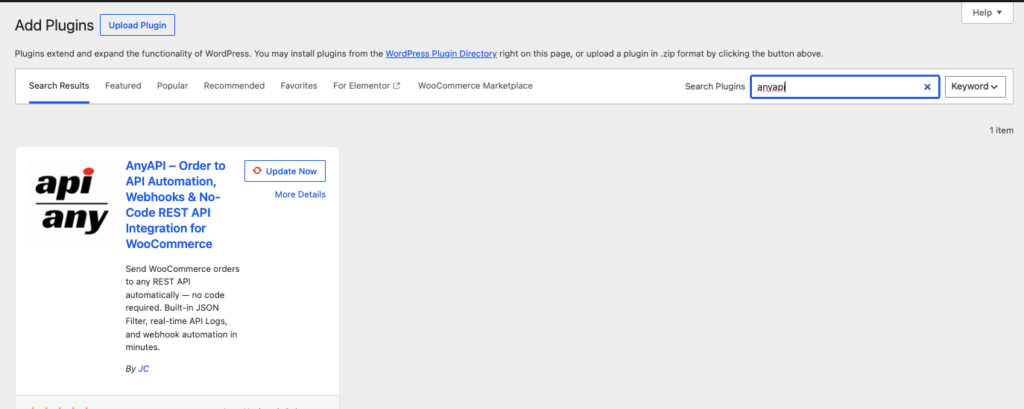
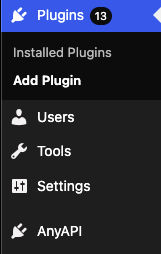
Once you see AnyAPI in the search results, click the Install Now button. After the installation finishes, click Activate to enable the plugin. As a result, AnyAPI will appear in your WordPress admin sidebar immediately.
Install AnyAPI Plugin via ZIP Upload
Alternatively, you can install the AnyAPI plugin manually by uploading a ZIP file. This method works well if your server has restricted internet access or if you prefer to download the plugin first.
To start, visit the AnyAPI page on WordPress.org and click the Download button. This saves a .zip file to your computer.
Next, go to your WordPress dashboard and navigate to Plugins → Add New. Then, click the Upload Plugin button at the top of the page. After that, click Choose File, select the anyapi.zip file you downloaded, and click Install Now.
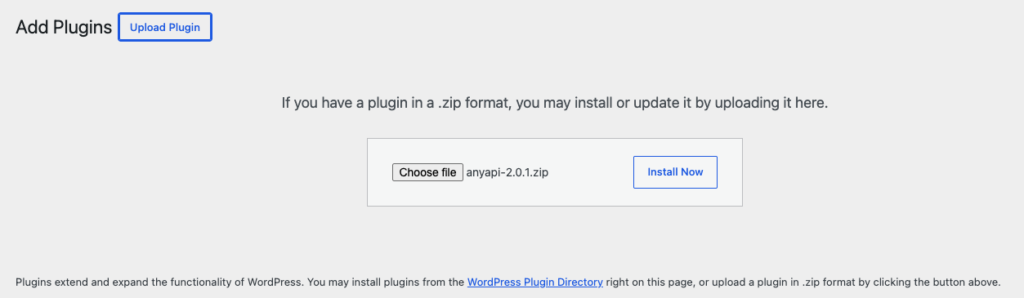
Once WordPress finishes the upload, click Activate Plugin. As a result, the AnyAPI menu will appear in your admin sidebar, just like the standard installation method.
Verify Your AnyAPI Plugin Installation
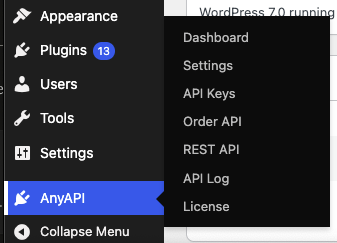
After you install the AnyAPI plugin successfully, take a moment to verify that everything works. First, look for the AnyAPI menu item in your WordPress admin sidebar. Then, click on it to open the AnyAPI Dashboard.
On the Dashboard page, you should see the following sections:
First, the API Keys tab where you manage authentication credentials. Second, the Order API tab where you set up integrations. Third, the API Logs section where you monitor API call activity. Finally, the REST API Tester tab where you test endpoints before going live.
If all four sections appear correctly, your installation is complete. From here, you can follow the Quick Start guide to send your first test API call.
Upgrade to AnyAPI Lite for Advanced Features
The free Starter plan gives you essential API integration tools. However, if you need more power, AnyAPI Lite unlocks advanced features such as JSON filter mode, unlimited API calls, and full log search capabilities.
To upgrade, visit the AnyAPI Pricing page and purchase a Lite license. After that, you will receive a license key in the format ANYAPI-XXXXXXXX-XXXXXXXX-XXXXXXXX-XXXXXXXX. For detailed activation instructions, see the Activate Your License guide.
In addition, you can compare all plan features on the Feature Comparison page to help you decide which plan fits your store best.
Troubleshoot Common AnyAPI Plugin Installation Issues
Although the installation process is straightforward, you may occasionally run into issues. Here are the most common problems and their solutions.
AnyAPI Menu Does Not Appear After Activation
If you do not see the AnyAPI menu after activation, first try refreshing your browser. Then, go to Plugins → Installed Plugins and confirm that AnyAPI shows as “Active.” In some cases, a plugin conflict may hide menu items. To test this, temporarily deactivate other plugins and check again.
“Plugin Could Not Be Installed” Error on ZIP Upload
This error usually means the ZIP file is corrupted or incomplete. To fix it, download the ZIP file again from WordPress.org. In addition, check that your server allows file uploads of at least 10 MB by reviewing PHP upload_max_filesize in your hosting control panel.
WooCommerce Not Detected Warning
Because AnyAPI requires WooCommerce, you will see a warning if WooCommerce is not active. To resolve this, go to Plugins → Installed Plugins, find WooCommerce, and click Activate. Consequently, the warning will disappear on the next page load.
What to Do After You Install the AnyAPI Plugin
Now that your installation is complete, here are the recommended next steps:
First, read What is AnyAPI to understand the core concepts. Then, follow the Quick Start: Webhook Test tutorial to send your first API call in under five minutes. After that, set up your API Key Management credentials for your target service.
Best of all, the entire setup process from installation to your first successful API call typically takes less than ten minutes.