
Your WooCommerce API logs are the single source of truth for every request AnyAPI sends. Whenever an order triggers an integration, AnyAPI records the outcome — success or failure — so you never have to guess whether your data actually arrived. In this guide, you will learn how to read your WooCommerce API logs and fix the most common errors.
What Your WooCommerce API Logs Capture
First, it helps to understand what AnyAPI records every time an integration fires. Specifically, each log entry stores:
- First, Time — When the request fired.
- Second, Method — The HTTP method used (GET, POST, PUT, PATCH, or DELETE).
- Third, Endpoint — The full URL AnyAPI sent the request to.
- Fourth, Status — The HTTP response code, shown as a color-coded badge (2xx, 4xx, or 5xx).
- Also, Latency — How long the external API took to respond, in milliseconds.
- Finally, Response — The first 2KB of the raw response body from the receiving API.
As a result, you can diagnose most problems without leaving your WordPress dashboard.
Starter vs. Lite: What You Can See
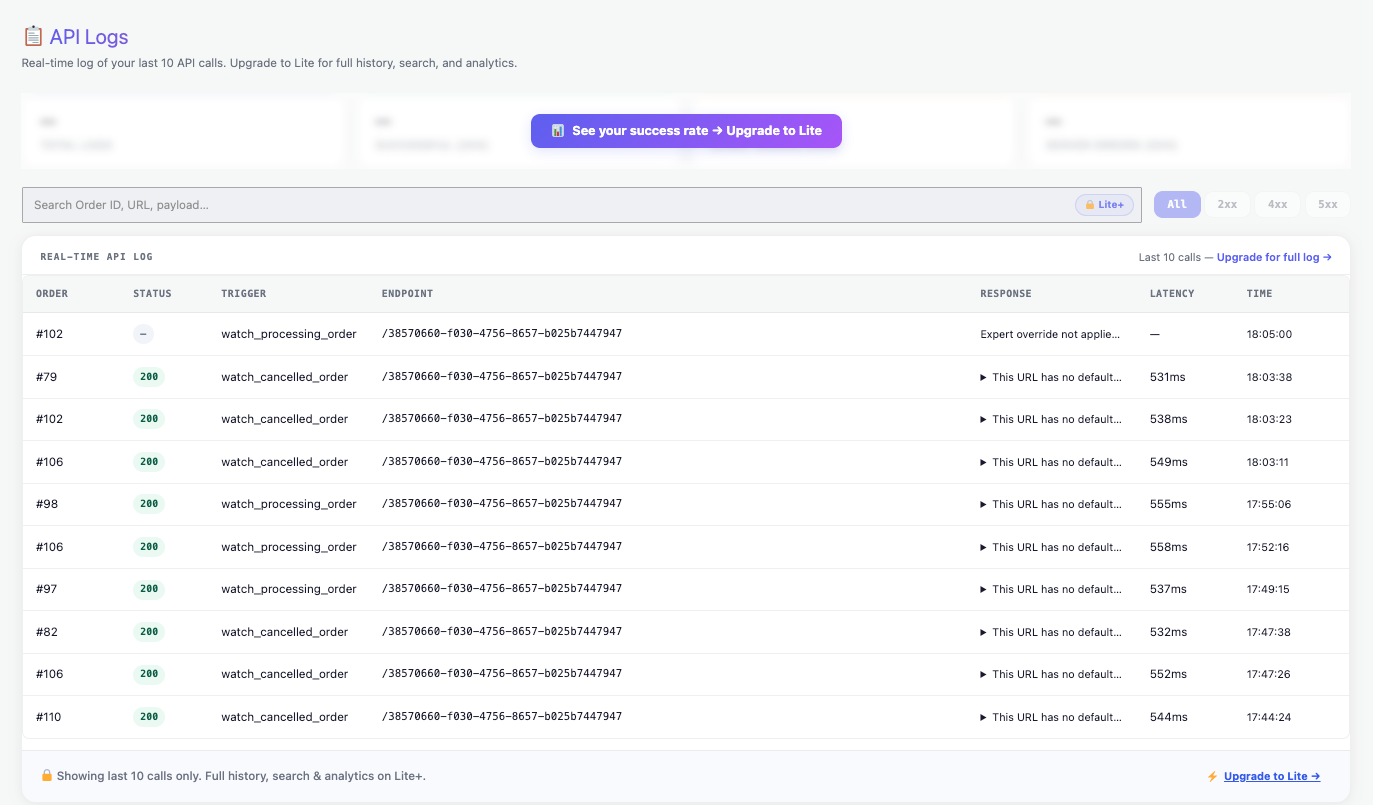
On the Starter (free) plan, the API Log page shows a static table of your most recent 10 calls. This gives you a quick snapshot, but you cannot search, filter, or paginate through older entries.
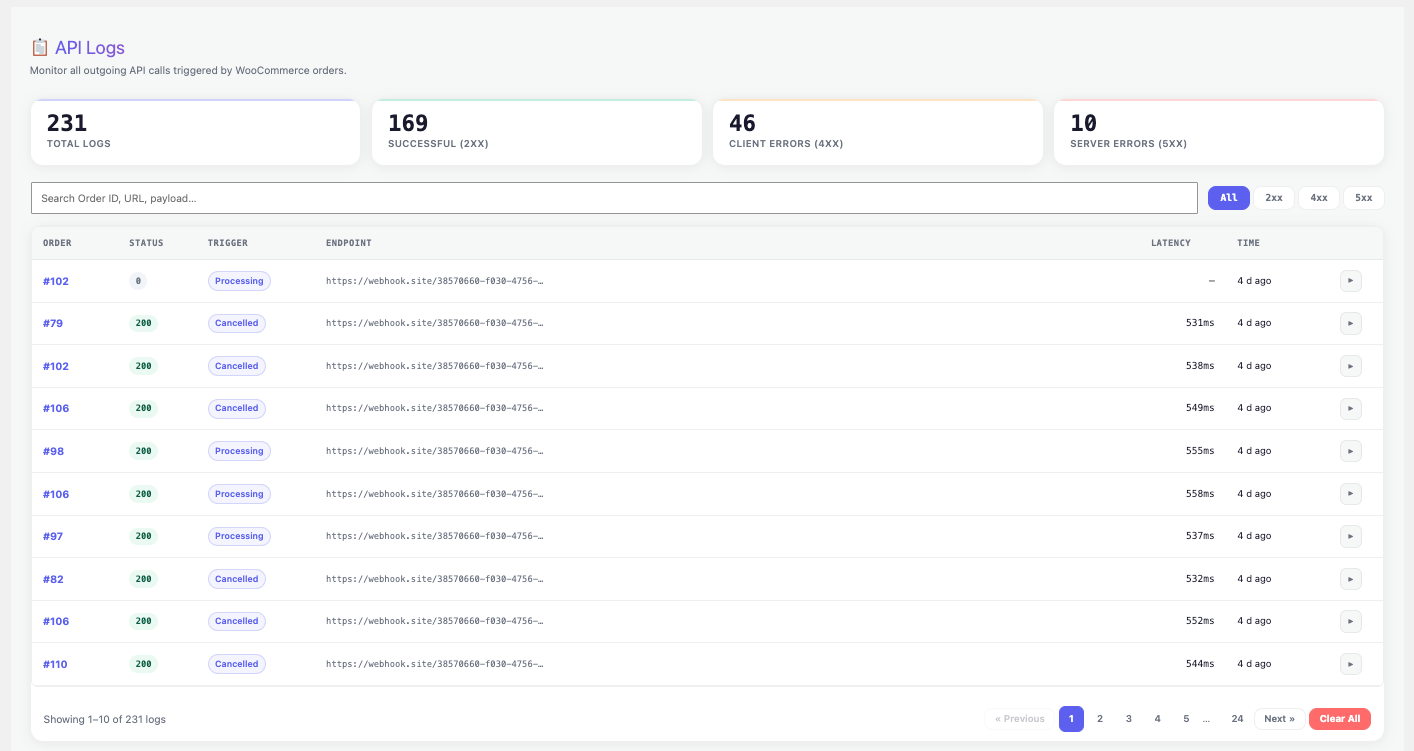
In contrast, the Lite plan and above unlocks the full log experience:
- First, stats cards — Total calls, plus a live breakdown of 2xx, 4xx, and 5xx responses.
- Second, search — Look up a specific order ID or endpoint.
- Third, status filters — Narrow the table to only successes or only failures.
- Fourth, pagination — Browse your complete call history, not just the last 10.
- Finally, Clear All Logs — Reset the table when you are done testing.
Therefore, if you are actively debugging an integration, upgrading unlocks the tools you need to isolate the problem faster. For a full breakdown of what each plan includes, see the Feature Comparison.
Reading the Response Column
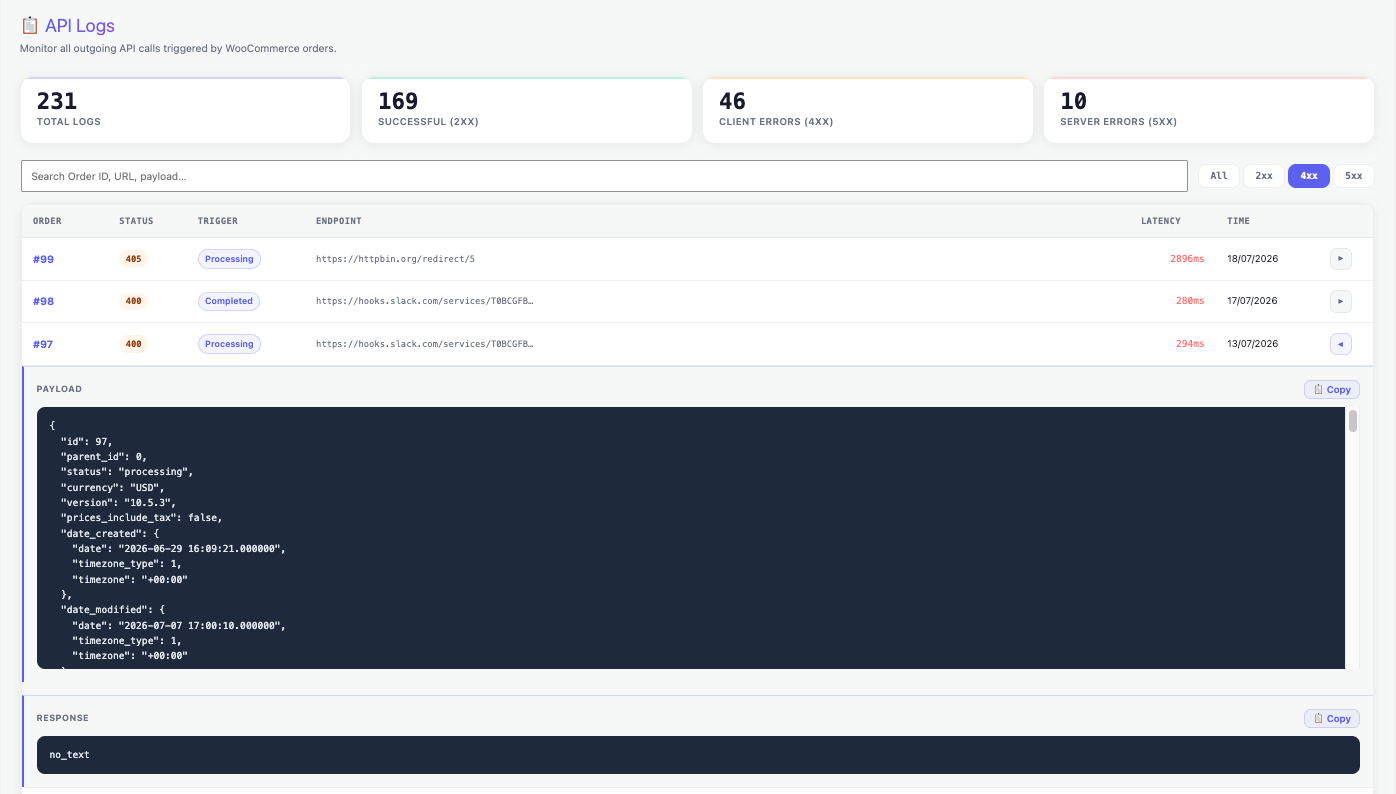
Once a request completes, AnyAPI stores the first 2KB of whatever the receiving API sent back. This is often the fastest way to understand why a call failed, because most APIs return a descriptive error message in the response body.
For example, a Slack webhook that rejects your payload might return no_text, telling you the required text field was missing. Similarly, a custom endpoint might return a validation error naming the exact field it did not recognize.
Note: AnyAPI escapes the response content before displaying it, so even if the receiving API returns raw HTML or a script tag, it renders as plain text in your dashboard — never executed.
Troubleshooting Common WooCommerce API Log Errors
If your WooCommerce order API integration is not behaving as expected, check the table below against what you see in the log.
| Symptom | Likely Cause | Solution |
|---|---|---|
| No log entry appears | Trigger does not match the order status change | Verify you selected the correct trigger for the status transition in Order API Integration |
| HTTP 401 or 403 | Invalid or missing API credentials | Check your API key in API Key Management |
| HTTP 400 | Malformed payload or missing required fields | Switch to Advanced or Expert filter mode to send only the fields your API expects — see JSON Filter Mode |
| HTTP 404 | Wrong endpoint URL | Double-check the URL for typos or trailing slashes |
| HTTP 500 | Server error on the receiving end | Contact the external service — this is not an AnyAPI issue |
| “Monthly call limit reached” | Starter plan 500 calls/month cap | Upgrade to Lite for unlimited calls, or wait until next month |
| Latency shows but Status is blank | Request timed out before a response arrived | Check whether the receiving endpoint is slow or unreachable; consider increasing your endpoint’s response speed |
Step-by-Step: Diagnosing a Failed Call
Rather than guessing, follow this sequence whenever a WooCommerce order API integration fails:
- First, open the API Log page and find the failed entry.
- Then, check the Status badge to identify whether it is a 4xx (your side) or 5xx (their side) error.
- Next, read the Response column for the exact error message the receiving API returned.
- After that, cross-reference the message against the troubleshooting table above.
- Finally, make the fix and place a fresh test order to confirm the new log entry shows a 2xx status.
In particular, if you are setting up a new integration for the first time, the Quick Start: Webhook Test guide walks through testing with webhook.site, a free tool that captures every request so you can see the raw payload before connecting a real endpoint.
Next Steps
Now that you know how to read your WooCommerce API logs, these related resources can help you go further:
- Order API Integration — Set up triggers and filters from scratch.
- API Key Management — Create and manage Basic Auth and Bearer Token credentials.
- JSON Filter Mode — Build a custom payload with Expert mode.
- For a full reference on standard HTTP status codes, see the MDN HTTP response status codes documentation.
Frequently Asked Questions
API Logs & Troubleshooting FAQ
Does AnyAPI automatically retry failed WooCommerce API calls?
Yes. When a call fails with a temporary error — HTTP 429, 502, 503, 504, or a connection-level WP_Error — AnyAPI automatically retries it once through a background WordPress Cron channel, so a brief outage on the receiving side does not cost you the order data. The retry runs asynchronously and never blocks your order from saving, and it respects the destination’s Retry-After header up to a 300-second cap. Permanent errors such as 400, 401, or 404 are not retried, because resending an unchanged request would only fail again. Your log records only the final outcome, and this works identically on every plan, including free Starter.
What are the API log limits on the free AnyAPI plan?
On the free Starter plan, the API Log page displays a static table of your 10 most recent calls, with no search, filtering, or pagination. That is enough for a quick check after setup, but limited when you are actively debugging. The Lite plan unlocks the full log: stats cards summarising your 2xx, 4xx, and 5xx responses, search by order ID or endpoint, status filters, pagination through your entire call history, and a Clear All Logs button for resetting after tests.
Why does my API log show latency but no status code?
When the Latency column shows a value but the Status badge stays blank, the request left AnyAPI and began waiting, but the receiving endpoint never returned a complete response before the connection timed out. This usually means the destination server is slow, overloaded, or unreachable at that URL. Confirm the endpoint is online and responds quickly to a manual test, and check the URL for typos or a missing path. Unlike a 4xx or 5xx result, a blank status means no full reply was ever received.
How do I fix an HTTP 400 error when sending WooCommerce orders to an API?
An HTTP 400 means the receiving API treated your payload as malformed or missing a required field. WooCommerce produces a large order object by default, and many APIs reject anything they do not recognise. The fix is to send only the fields the API expects: switch to Advanced or Expert filter mode in AnyAPI and shape the payload to match the API’s required structure. Read the Response column in the log first — it usually names the exact field that caused the rejection, which tells you what to adjust.
What does an HTTP 401 or 403 error mean in my WooCommerce API log?
A 401 or 403 status means your request reached the endpoint but the receiving API rejected its credentials. The API key, Bearer token, or Basic Auth details AnyAPI sent were missing, incorrect, or expired. Open API Key Management and confirm the credential is entered exactly as the external service expects, with no extra spaces, then save and place a test order. Any 4xx code points to something on your side of the request — the configuration — rather than a fault in AnyAPI itself.
Why is my WooCommerce API call not appearing in the logs?
If a request never shows up in your AnyAPI logs, the integration’s trigger did not match the order’s status change. AnyAPI only fires — and only records a log entry — when the exact event you selected happens, such as an order moving to Processing or Completed. Open your Order API integration, confirm the selected trigger matches the status transition you are testing, then place a fresh test order. If nothing still appears, the order is likely not reaching that status at all, so no integration is being triggered to log.